How to use the CC GPU cluster
Authors: Guillaume Baulieu, Colin Bernet. If you need help or if you see any issue, just contact us.
You can find here some information on how to use the CC IN2P3's GPU cluster. This is not meant to be THE way to use the cluster, just a working starting point that you can tweak and upgrade.
This document is organized as follows:
- Introduction and initial setup
- Deep learning with TensorFlow in python:
- How to install the software and prepare your environment
- Train a deep neural net to recognize handwritten digits
- Deep learning using CUDA directly
- How to compile with CUDA
- Detect objects in an image
- Job submission
- Cheat sheet : commands for interactive login and singularity
Introduction and initial setup
Account and access rights
You first need an account at CCIN2P3. You also need access rights to the GPU queues on the batch system. Check on the users portal if you already have the rights : the list of the available queues is on the bottom right corner. You should have at least one of:
- mc_gpu_interactive
- mc_gpu_medium
- mc_gpu_long
If needed, you can ask access to the GPU cluster via a ticket.
Cluster hardware (May 2019)
From the hardware point of view, the GPU cluster is composed of 16 servers, each one hosting 4 GPU cards :
- 10 servers with 4 Tesla K80 and 16 CPU cores
- 6 servers with 4 Tesla V100 and 20 CPU cores
For each architecture, one of the servers is reserved for interactive access, allowing you to test your code in a more friendly environnement.
As a consequence, 36 Telsa K80 slots and 20 Tesla V100 slots are available for batch jobs.
Singularity
The software you need is probably not installed on the cluster. Or maybe it is, but not the version you want! And in any case, it is probably not installed in the exact way you want...
It would be so much better if you could bring your own system with you... Oh, what a wonderful coincidence : you can.
Singularity will give you the possibility to run an existing image on the cluster.
Bertrand Rigaud from CCIN2P3 provides a set of singularity images for the GPU farm. These images contain:
- a centos 7 operating system, which is also installed on the CCIN2P3 interactive machines, and at CERN for example.
- different versions of CUDA and cuDNN specifically compiled for the machines on the farm, and compatible together
Deep learning with TensorFlow in python
Nowadays, more and more people choose to do deep learning in python with TensorFlow, and keras is very often used as a convenient interface to TensorFlow.
In this section, you'll learn how to:
- install keras and tensorflow on the farm
- test your setup interactively
- submit your first batch job
We will use the K80 machines in this tutorial, but you will see that it is easy to prepare code for the V100 machines.
Installation of the python deep learning tools
Log in the CCIN2P3 interactive machines:
ssh -X cca.in2p3.fr
We will install all the tools we need through Anaconda, which is by far the easiest method.
So first install miniconda. Choose the Linux 64-bit installer for python 3.7:
wget https://repo.anaconda.com/miniconda/Miniconda3-latest-Linux-x86_64.sh
bash Miniconda3-latest-Linux-x86_64.sh
Miniconda will edit your .bashrc so that you can use conda next time you log in. For now, just start a bash shell to make this possible:
bash
Then, we will create a virtual conda environment for the K80 machines. When you want to use the V100, you will need to make another environment in the same way:
K80 SPECIFIC (replace k80 by e.g. v100 for a V100 environment)
conda create -n k80 python=3.6
As you can see, we downgrade python from its default version 3.7 to 3.6, as the installation of the packages below would anyway trigger the downgrade. That's just a way to gain a bit of time.
Installation of TensorFlow
We want to install the version of TensorFlow compiled by Bertrand for the K80 machines we want to use, and not the default version provided by Anaconda.
To do this, we need to log to one of the interactive machines on the GPU farm, and to enter the singularity image that we will use in our jobs.
Log to the GPU farm:
K80 SPECIFIC (replace K80 by V100 to log to a machine with V100 GPUs)
qlogin -l os=cl7,GPU=1,GPUtype=K80 -q mc_gpu_interactive -pe multicores_gpu 4
In this command, we request a single K80 GPU. No need for more to do tests, but you could request up to 4. The other arguments must stay as they are.
Please note that there is an issue with the qlogin command. If no interactive slot is found, you will be bumped out of the queue and be told to try again later. Instead, one should stay in the queue until a slot is found. Please report this problem to CCIN2P3 if you see it.
Now open a shell in the singularity image.
/bin/singularity shell --nv --bind /pbs:/pbs --bind /sps:/sps /cvmfs/singularity.in2p3.fr/images/HPC/GPU/centos7_cuda9-2_cudnn7-3_nccl2-2-12.simg
Following the compatibility table from Bertrand we have chosen CUDA 9.2 and cuDNN 7.3.
In the singularity shell, bash is not executed by default, so start a bash shell so that you can use conda:
bash
Activate your k80 environment:
conda activate k80
And install TensorFlow in this environment:
K80 SPECIFIC. Pick up the v100 wheel if you want to install TensorFlow for the V100.
pip install /pbs/software/centos-7-x86_64/cc_python_modules/HPC/tensorflow/k80/tensorflow-1.11.0-cp36-cp36m-linux_x86_64.whl
Please note that:
- There is one TensorFlow for the K80, and one for the V100
- The TensorFlow you pick is installed in your conda environment.
Therefore, if you want to use both the K80 and the V100, you need two different conda environments
Now test that you can see the GPU that you have reserved:
nvidia-smi
Tue May 14 11:36:10 2019
+-----------------------------------------------------------------------------+
| NVIDIA-SMI 418.39       Driver Version: 418.39       CUDA Version: 10.1     |
|-------------------------------+----------------------+----------------------+
| GPU  Name        Persistence-M| Bus-Id        Disp.A | Volatile Uncorr. ECC |
| Fan  Temp  Perf  Pwr:Usage/Cap|         Memory-Usage | GPU-Util  Compute M. |
|===============================+======================+======================|
|   0  Tesla K80           Off  | 00000000:05:00.0 Off |                    0 |
| N/A   32C    P8    29W / 149W |      0MiB / 11441MiB |      0%      Default |
+-------------------------------+----------------------+----------------------+

+-----------------------------------------------------------------------------+
| Processes:                                                       GPU Memory |
|  GPU       PID   Type   Process name                             Usage      |
|=============================================================================|
|  No running processes found                                                 |
+-----------------------------------------------------------------------------+
and that TensorFlow works in python:
python -c "import tensorflow as tf; tf.enable_eager_execution(); print(tf.reduce_sum(tf.random_normal([1000, 1000])))"
2019-05-14 11:37:07.005287: I tensorflow/core/common_runtime/gpu/gpu_device.cc:1411] Found device 0 with properties:
name: Tesla K80 major: 3 minor: 7 memoryClockRate(GHz): 0.8235
pciBusID: 0000:05:00.0
totalMemory: 11.17GiB freeMemory: 11.11GiB
2019-05-14 11:37:07.005355: I tensorflow/core/common_runtime/gpu/gpu_device.cc:1490] Adding visible gpu devices: 0
2019-05-14 11:37:07.937916: I tensorflow/core/common_runtime/gpu/gpu_device.cc:971] Device interconnect StreamExecutor with strength 1 edge matrix:
2019-05-14 11:37:07.937969: I tensorflow/core/common_runtime/gpu/gpu_device.cc:977]      0
2019-05-14 11:37:07.937982: I tensorflow/core/common_runtime/gpu/gpu_device.cc:990] 0:   N
2019-05-14 11:37:07.938631: I tensorflow/core/common_runtime/gpu/gpu_device.cc:1103] Created TensorFlow device (/job:localhost/replica:0/task:0/device:GPU:0 with 10762 MB memory) -> physical GPU (device: 0, name: Tesla K80, pci bus id: 0000:05:00.0, compute capability: 3.7)
tf.Tensor(2671.9058, shape=(), dtype=float32)
A simple test: handwritten digit recognition
We will follow this tutorial about handwritten digit recognition, with keras and TensorFlow.
If you want to understand what we're going to do, you can already follow this tutorial on the google colab platform, where GPUs will be allocated to you.
On the farm, matplotlib cannot be used, so we won't be able to do any plot. However, we can still train a deep neural net in the very same way.
For this, get this simple script:
wget https://raw.githubusercontent.com/cbernet/maldives/master/hwd_deeplearning_google/hwd_dl.py
and look inside:
# load the data -------------------------
import tensorflow as tf
(x_train, y_train), (x_test, y_test) = tf.keras.datasets.mnist.load_data()

# preprocessing: -------------------------

# normalizing the greyscale to 1
import numpy as np
x_train = x_train/255.
x_test = x_test/255.

# reshaping for keras
kx_train = x_train.reshape(len(x_train),28,28,1)
kx_test = x_test.reshape(len(x_test),28,28,1)


# one-hot encoding:
# turn the category label (0, 1, ... or 9)
# to a binary array of length 10, e.g.
# 2 -> [0,1,0,...0]

y_train = tf.keras.utils.to_categorical(y_train, 10)
y_test = tf.keras.utils.to_categorical(y_test, 10)

# build the deep neural net -------------

from tensorflow.keras import models
from tensorflow.keras import layers
from tensorflow.keras.optimizers import RMSprop

model = models.Sequential()
model.add( layers.Conv2D(16, 4, input_shape=(28,28,1), activation='relu') )
model.add( layers.MaxPooling2D(2) )
model.add( layers.Conv2D(32, 4, activation='relu') )
model.add( layers.MaxPooling2D(2) )
model.add( layers.Flatten() )
model.add( layers.Dropout(0.4) )
model.add( layers.Dense(100, activation='relu') )
model.add( layers.Dense(10, activation='softmax') )
model.summary()
model.compile(loss='categorical_crossentropy',
              optimizer=RMSprop(lr=0.001),
              metrics=['acc'])

history = model.fit(kx_train, y_train, validation_data=(kx_test,y_test),
                    batch_size=200, epochs=40)

model.save('model.h5')
and just run it:
python hwd_dl.py
You should get an accuracy of about 99.4% for the recognition of handwritten digits. The trained model for the deep neural network is saved to model.h5 and can be loaded to be used later for evaluation.
Deep learning using CUDA directly
Instead of using TensorFlow in python, you might want to run custom code directly compiled with CUDA.
As an example, we will use darknet, which is a package designed for advanced object detection in images. This package is written in C, and has to be compiled with CUDA.
Here is a detailed tutorial on how to compile and use darknet. Here, we will focus on the installation of darknet on the GPU farm.
Log in the CCIN2P3 interactive machines:
ssh -X cca.in2p3.fr
As in the previous section, log in an interactive machine of the GPU farm:
qlogin -l os=cl7,GPU=1,GPUtype=K80 -q mc_gpu_interactive -pe multicores_gpu 4
Now open a shell in the singularity image.
/bin/singularity shell --nv --bind /pbs:/pbs --bind /sps:/sps /cvmfs/singularity.in2p3.fr/images/HPC/GPU/centos7_cuda9-2_cudnn7-3_nccl2-2-12.simg
Check the LD_LIBRARY_PATH,
echo $LD_LIBRARY_PATH
/usr/local/cuda/lib:/usr/local/cuda/lib64::/.singularity.d/libs
and check that the nvidia compiler is available:
which nvcc
/usr/local/cuda/bin/nvcc
We see that CUDA is installed in /usr/local/cuda, which is what is expected in the Makefile of darknet.
Follow the instructions of the tutorial, but skip the following sections (since we already have CUDA, and we don't really need OpenCV):
- Install CUDA
- Testing CUDA
- Install OpenCV
However, you should the following:
- Install darknet
- Edit the Makefile, enable GPU support, and keep OPENCV support disabled.
- compile
Finally, let's try it!
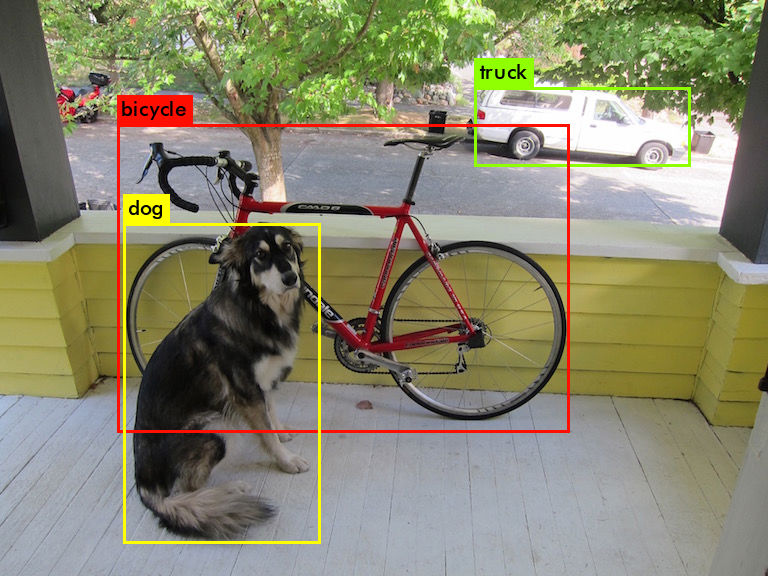
First, we download the weights of the YOLOv3 deep neural network, which has already been trained by the darknet authors. This model is the currently the most advanced object detection model. Then, we run the detection on one image:
./darknet detect cfg/yolov3.cfg yolov3.weights data/dog.jpg
This creates an output image. To see it, open a terminal on cca.in2p3.fr, and do:
display predictions.jpg
Job submission
Now that we know how to use the farm interactively, with or without python, let's see how to run a job.
The official GPU jobs documentation is available on the CC website but at this stage, it's not really useful to get started, only as a reference. We recommend that you stick to our instructions.
First follow the instructions above to train a deep neural network for handwritten digit recognition.
We will now run the script hwd_dl.py on the farm, as a batch job.
First, login to the CCIN2P3 interactive machines (and not to the interactive machines of the GPU farm):
ssh -X cca.in2p3.fr
We have to create two scripts:
- a wrapper script that will initialize the conda environment and run your python script in this environment
- a job script that will run the wrapper script with singularity
The wrapper script can be re-used for all your python jobs, whatever the conda environment you want to use, so let's put it in our home:
wrapper.sh:
#!/bin/bash
. $HOME/miniconda3/bin/activate $1
python $2
As you can see, the wrapper script is really quite simple. You provide the name of the conda environment as a first argument, and the name of the python script you wish to run as a second argument.
You could also provide the arguments of the python script, but this is left as an exercise.
Now let's create the job script:
job.sh:
#!/bin/bash
NAME=my_test_`echo $RANDOM`
# make sure to replace the script by yours here:
script=/pbs/home/c/cbernet/deeplearning/maldives/hwd_deeplearning_google/hwd_dl.py
conda_env=k80
singularity instance.start --nv --bind /pbs:/pbs --bind /sps:/sps /cvmfs/singularity.in2p3.fr/images/HPC/GPU/centos7_cuda9-2_cudnn7-3_nccl2-2-12.simg $NAME
singularity exec instance://$NAME bash $HOME/wrapper.sh $conda_env $script
singularity instance.stop $NAME
You can test this script interactively. Log in one of the interactive machines of the GPU farm:
qlogin -l os=cl7,GPU=1,GPUtype=K80 -q mc_gpu_interactive -pe multicores_gpu 4
Then do:
bash job.sh
Now you can log out of the interactive machine and submit the job:
qsub -l os=cl7,GPU=1,sps=1,GPUtype=K80 -q mc_gpu_medium -pe multicores_gpu 4 job.sh
In this command:
- os=cl7 : ask for CentOS7 operating system
- GPU=1 : we want 1 GPU card
- GPUtype=K80 : ask for a K80 GPU card, replace with V100 if you need a Tesla V100 GPU card. But for this, you need to prepare your conda environment accordingly, see Deep learning with TensorFlow in python
- sps=1 : if you need access to the SPS file system
- mc_gpu_medium : the queue we want to send the job to
- multicores_gpu 4 : this should always stay like this
Check the status of the job with:
qstat
When the job is done, the job outputs can be your home directory:
- the standard output and error are logged in files called
job.sh.*. model.h5has been transferred here from the worker.
You can change this if you wish, and further tune your job scripts, following the official instructions to run jobs at CCIN2P3.
Cheat sheet
Useful links
Interactive access
# log to cc
ssh -X cca.in2p3.fr
# interactive login to GPU farm
qlogin -l os=cl7,GPU=1,GPUtype=K80 -q mc_gpu_interactive -pe multicores_gpu 4
# launch a shell into the singularity container:
/bin/singularity shell --nv --bind /pbs:/pbs  --bind  /sps:/sps /cvmfs/singularity.in2p3.fr/images/HPC/GPU/centos7_cuda9-2_cudnn7-3_nccl2-2-12.simg
# start bash shell
bash
# activate conda environment if needed
conda activate k80
Checks
Checking the reserved GPUs (on a machine of the GPU farm):
nvidia-smi